Texture Size
A big part of avatar download and VRAM sizes are textures. Reducing the size and/or quality of these textures can drastically decrease your avatar’s download/upload and VRAM sizes. Although this can be a bit annoying and tedious.
Caution
Crunch compression does not decrease VRAM usage, only download size of your avatar will be smaller. It can also make your textures look worse.
Introduction
Although you can just use the import setting directly in unity to change texture size and quality texture by texture, this gets annoying quite fast. Something like Thry’s Avatar Performance Tools can definitely help narrow down the big ones, but it’s still slow.
I recommend using Avatar Texture Tool from Whiteflare’s Avatar Tools.
Setup
Usage
Open Avatar Texture Tool
To open the Avatar Texture Tool go to Tools > whiteflare > Avatar Texture Tool in the top bar, this will open a new window.
Select your avatar
Now select your avatar, the easiest way to do is by dragging your avatar into the Root object slot. Or by clicking the little target thing and searching for your avatar.
You should now see something like this:
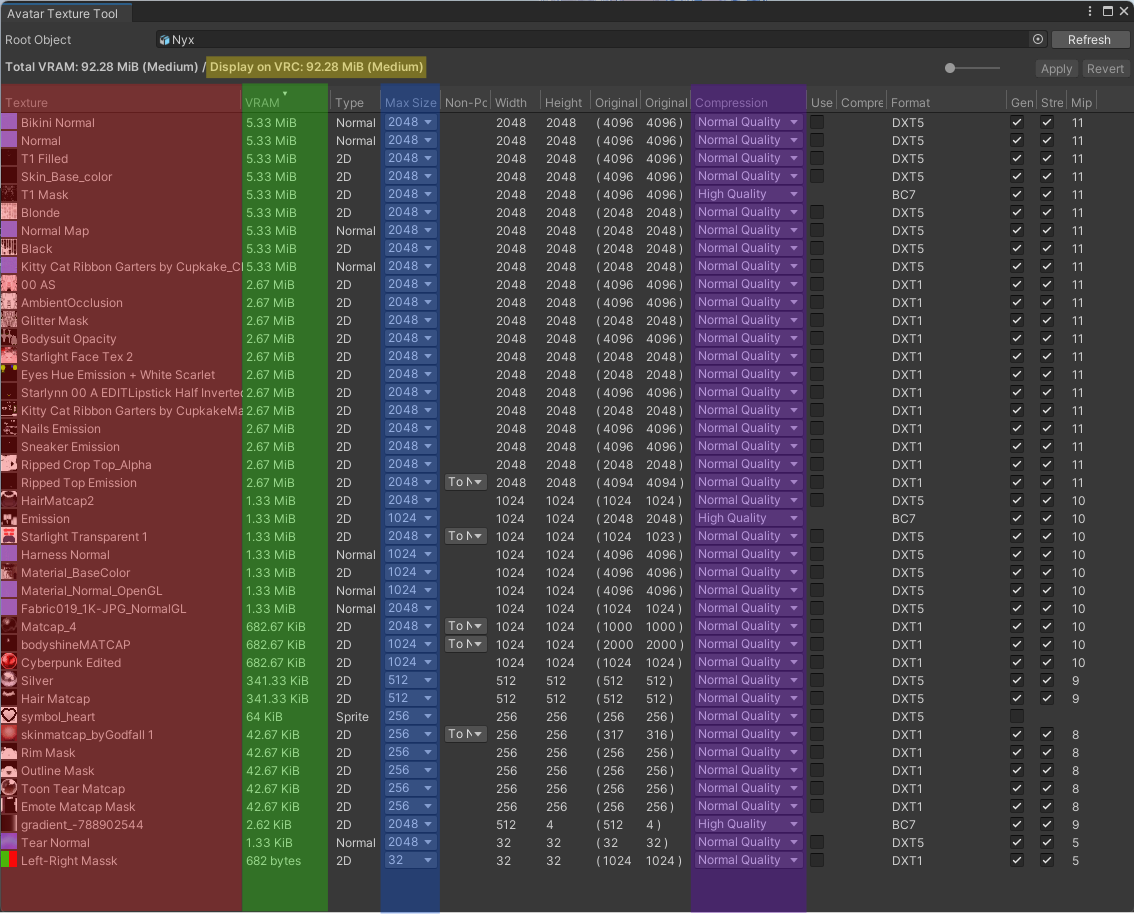 It may look like a lot but don’t worry, the colored areas are the only really important ones.
- Texture Name: Name of the texture as in your assets files
- VRAM: Amount of VRAM used by the texture, this depends on the size and quality settings of the texture
- Size: Size of the texture that will be used by the avatar (This won’t affect the size of the source texture)
- Compression/Quality: How good the compression is, lower compression usually means smaller size but at receded visual quality (Think about for example YouTube compression)
- Total Texture VRAM: The total VRAM used by textures, this is also the statistic VRChat shows as
Texture Memory. (Note: This is not the total amount of VRAM used by an avatar, meshes and other things also use VRAM, but generally to a lesser extent)
Changing Texture Size
Change Max Size
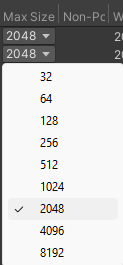
Click the drop-down of Max Size of a texture, this will give a new pop-up with a bunch of numbers. This is the max size of the texture.
- Lower is less detailed but uses less VRAM.
- Higher is more detailed but uses more VRAM.
Apply the settings
When changing the number Max Size (or any setting) it won’t automatically apply the settings. The unapplied setting will show up yellow. Click the Apply button to apply the settings you changed.

Check what you did is good
First check what you just did changed the VRAM amount. If it didn’t change it may be because the source texture size is smaller or the same size, then try lowering the Max Size again.
Now look from about 1 meter away and look for any quality loss, some is fine, but you don’t want it to look like a Minecraft texture.
Tip
You can also increase the size for some textures, this will increase the VRAM size, but for bigger meshes like your body it may look better. Or for meshes where people will be looking a lot, like your face, it may be nice to have a bit more detail.
Tip
Generally for smaller meshes like nails, a texture size of 1024 is more than enough.
Note
If your texture has some weird artifacts around it, go check out Changing Compression Quality
Changing Compression Quality
When to change compression quality
Often enough the Normal Quality is fine. But sometimes there may be artifacts around the texture, especially for masks, or with textures with high contrast. Then we can change the compression quality to make the texture look better.

Change compression
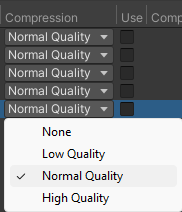
Click on the drop-down of Compression of a texture, this will pop-up with a few compression options. By default this will be set to Normal Quality, which should be fine for most textures.
Warning
Changing the compression quality can increase the VRAM used by the texture.
Apply the settings
Apply the settings as in Changing Texture Size.
The unapplied setting will show up yellow. Click the Apply button to apply the settings you changed.
Check what you did made it better
Here you can see what better compression looks like. (The texture looks smoother and less blocky)