UV Tile Discard
UV Tile Discard allows for part of a mesh to be hidden, allowing for example the use of multiple toggles on a single mesh.
Introduction
The most popular shaders used in VRChat support UV Tile Discard. Such as: Poiyomi, lilToon, and orels. It’s a fast and optimized way to hide part of a mesh. This way you can have multiple toggles without increasing draw call and material slot counts (if the mesh uses one material). However, UV Tile Discard can be quite confusing to set up at first.
Setup Blender
Setup the UV Editing tab
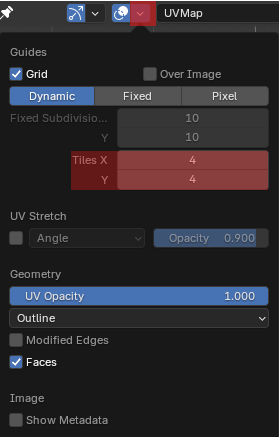
Go to the UV Editng tab, then click the arrow next to the 2 circle looking thing. (It’s on left window, on the top right-ish, if you have the default layout)
Then change the Tiles X and Y to 4. This will help to show what column and row vertices are in.
Creating a new UV Map
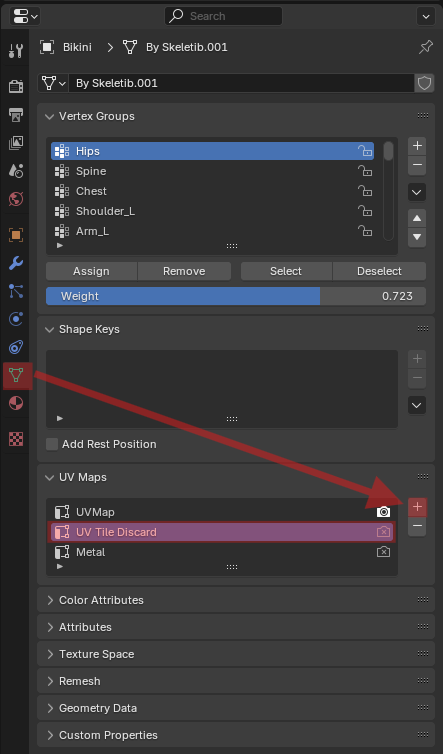
To avoid any rendering issues we’ll be making a new UV Map. With an object selected, go to the Data Properties tab, and create a new UV Map. Be sure to give it a useful name, like UV Tile Discard or UV1.
Important
Take note of the order of the UV Maps, the shader in Unity won’t have a friendly name like in blender. But instead it will have UV0, UV1, UV2, and UV3, in that order.
Example of ordering
In the image below there are 3 UV Maps: UVMap, UV Tile Discard, and Metal. These would map like this:
| Name in blender | Name in Unity |
|---|---|
UVMap | UV0 |
UV Tile Discard | UV1 |
Metal | UV2 |
UV3 |
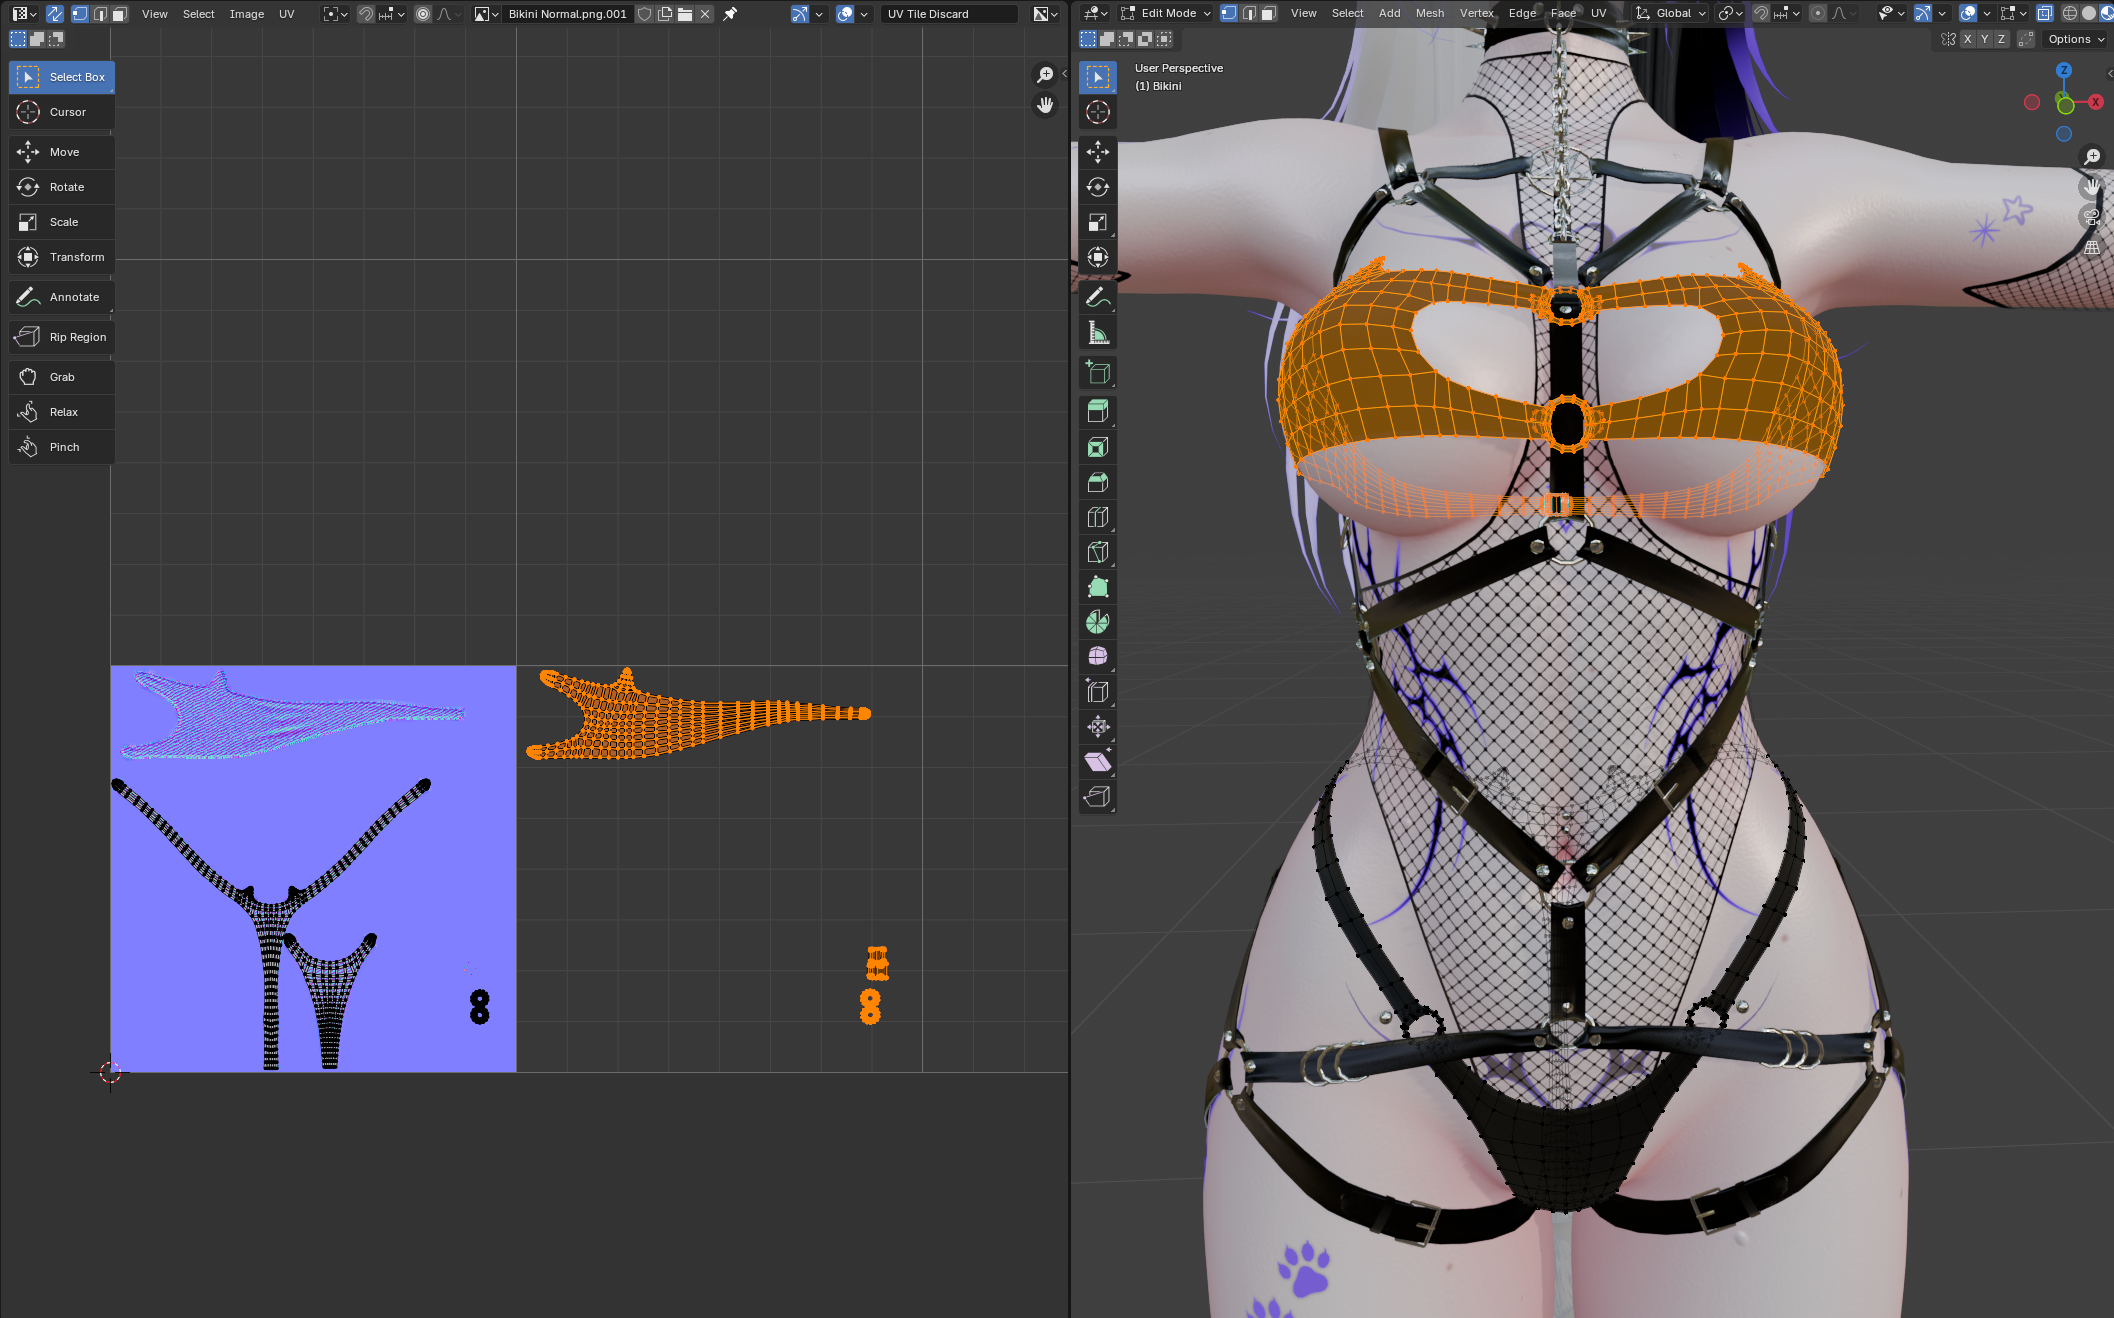
Moving part of mesh to a different tile
Select part of the mesh you want to make a different toggle. Then on the left window press G, then X, then 1 to move the selected mesh over by 1 tile. The same can be done in the Y axis and with multiple tile steps at once, just change X to Y and 1 to a number between -3 and 3.
Setup Unity
Note
For this part of the guide we’ll be using Poiyomi shaders, but other shaders (should) work in a similar way.
Enable UV Tile Discard in your shader
Most shaders require you to enable UV Tile Discard. In Poiyomi this is under Special FX, then you should see a matrix like this.

Set the correct UV Map
By default this is set to UV1 which should be fine. But you may need to change the Discard UV to the correct UV Map, check back on Creating a new UV Map if you aren’t sure what UV Map to choose.
Creating toggles
You can animate each of these tiles alone like you would with any other toggle.
Example
Note
See why the GameObject gets enabled and disabled alone with the UV Tile here.


Extra performance
Warning
This is something I (AwA) do, I’ve only tested this with Direct Blendtrees, not with the layer toggle method.
From my limited amount of heavily edited and custom avatars, it does slightly improve performance in GPU limited scenarios. Although I encourage anyone to disprove or validate this approach with scientific testing.
If you hide the entire mesh with UV Tile Discard, it would also be good to disable the GameObject. This way the skinned mesh renderer doesn’t need to also calculate the weights of a mesh that you won’t see anyway.
To do this I simply enable and disable the GameObject along with the UV Tile I want to discard.